This is the 2nd part of the blog: EOSIO dApp on Blockchain Step-by-Step: Part 1. The last blog described the EOSIO setup processes steps-by-steps. This part will develop a Smart Contract for EOSIO platform.
Development
The purpose of the smart contract is to simulate an election. I created an EOSIO user to host the smart contract. Created two citizen users to vote for a candidate. The voting records keep saving in the EOSIO blockchain. In this example, all operations are operating in command mode. Let’s get started.
Develop the Smart Contract
EOSIO executes the smart contract which is developed in WebAssembly standard. So I developed the election smart contract in C++. Below is the full source code of election.cpp:
Note the last line EOSIO_ABI() is a macro statement to generate ABI file automatically rather than write it manually. ABI file is to define the apply action handler. Which tells the EOSIO the definition of the handlers inside the smart contract.
EOSIO provides multi-index database API for us to persist data into the blockchain. In the above election smart contract, I defined two multi_index (similar to SQL table): candidates and voters. Actually which are two arrays to store the two struct: candidate and voter. I used C++ STL to manipulate the multi_index such as add, update, delete.
Note that the two struct are marked with /// @abi table at the beginning. This is to tell EOSIO abi generator to generate the ABI tables into the election.abi file. Which is very convenient.
To compile the election smart contract:
$ eosiocpp -o election.wast election.cpp
The WAST and WASM files are generated respectively. But it is not enough for EOSIO. We need to generate the ABI file as well:
$ eosiocpp -g election.abi election.cpp
Optional Files for Visual Studio Code
To enhance the development experience, I’ve created a properties file c_cpp_properties.json for Visual Studio Code (VSCode) to tell it how to find the header files. The file needs to be stored in .vscode directory as below:
The file content of .vscode/c_cpp_properties as below:
{
  "configurations": [
    {
      "name": "Linux",
      "includePath": [
        "${workspaceFolder}/**",
        "~/eos/contracts",
        "~/opt/boost/include"
      ],
      "defines": [],
      "compilerPath": "/usr/bin/clang++-4.0",
      "cStandard": "c11",
      "cppStandard": "c++17",
      "intelliSenseMode": "clang-x64"
    }
  ],
  "version": 4
}
Start the EOSIO
The machine is continuously using the virtual machine which was well configured (mentioned in part 1). To start the single-node Testnet server:
$ nodeos -e -p eosio --plugin eosio::wallet_api_plugin --plugin eosio::chain_api_plugin --plugin eosio::history_api_plugin --access-control-allow-origin=* --contracts-console
Click here for more info on the nodeos parameters.
Create the Accounts
The next task is to unlock the default wallet. EOSIO stores the keypairs in the wallet. It needs to be unlocked every time when the server restart or every 15 minutes. To unlock the wallet:
$ cleos wallet unlock --password ${wallet_password}We need to create owner keypairs and active keypairs respectively. Then import that private keys to the wallet. Type below command:
$ cleos create key # Create an owner key
$ cleos create key # Create an active key
$ cleos wallet import ${private_owner_key}
$ cleos wallet import ${private_active_key}
Don’t forget to record those keypairs in somewhere
The next task is to create a new account election to hold the smart contract. Type below command:
$ cleos create account eosio election ${public_owner_key} ${public_active_key}In addition, create two citizens for voting simulation:
$ cleos create account eosio voter1 ${public_owner_key} ${public_active_key}
$ cleos create account eosio voter2 ${public_owner_key} ${public_active_key}
Deploy the Smart Contract
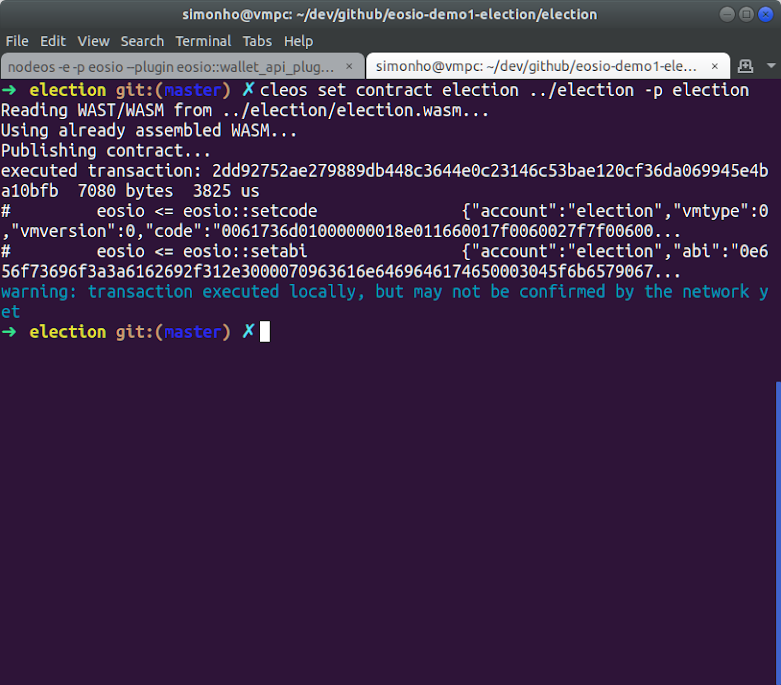
Type below command to upload the election smart contract:
$ cleos set contract election ../election -p election
The resulting screenshot:
Run the Smart Contract
We can try to run the contract.
1. Run the version action:
$ cleos push action election version '' -p election
We can inspect the console output from nodeos:
2. Adding election candidates:
$ cleos push action election addc '["Hillary Clinton"]' -p election
$ cleos push action election addc '["Donald J. Trump"]' -p election
3. Shows the candidates database which is storing in the blockchain:
$ cleos get table election election candidate
The resulting screenshot:
4. Simulate voting (both voters are voted to Donald J. Trump):
$ cleos push action election vote '["voter1", 1]' -p voter1
$ cleos push action election vote '["voter2", 1]' -p voter2
If voter1 votes again:
$ cleos push action election vote '["voter1", 0]' -p voter1
EOSIO returns exception:
5. See the election result:
$ cleos get table election election candidate
As you can see, the vote count of candidate “Donald J. Trump” is 2. That means the Election Smart Contract was working!
That’s all for this part.
In the next part, I will create a web app for demonstrating the interaction between web visitors and the blockchain.
The source code host at this github repo


Comments
Post a Comment